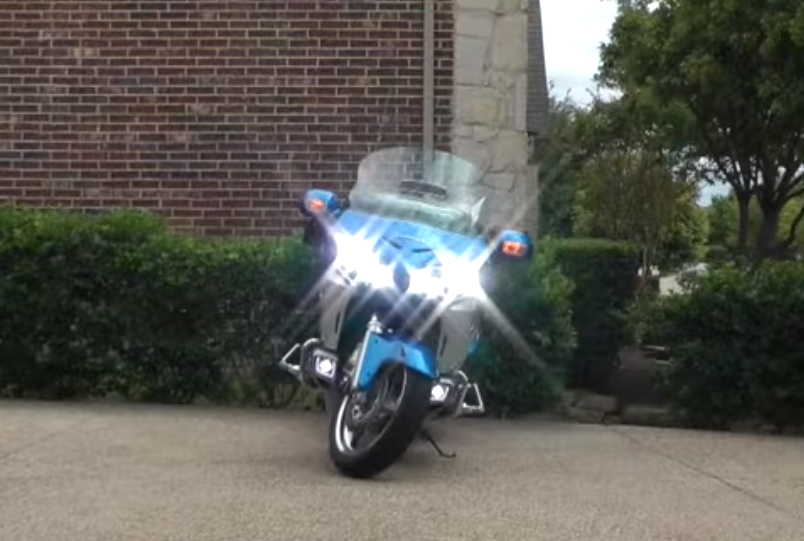
Driving a motorcycle offers a pleasant experience on the open road. Bicycles go almost anywhere on the road is available, and sometimes when there is no road. Problems can arise when riding on a foggy day. The headlights of a motorcycle sit on top of the motorcycle, and most do not come equipped with fog lights. Installing a set of h7 led fog lights on a bicycle improves its appearance and provides an additional level of safety.

Explanation
- Disconnect the battery by loosening the post connection bolt to the battery with an adjustable wrench. Move the connectors back and lift the motorcycle battery.
- Cover the fuel tank and areas where work is done with a soft cloth to protect the motorcycle from scratches.
- Remove the six screws from the lower front cover using a 5 mm Allen wrench. The lower front fairing is a fender located below the led headlights.
- Remove the equipment clips located at the top of the lower front fairing by pulling them out. Remove the lower front fairing.
- Place the lower front fairing down on a soft cloth and remove the cuts using a knife.
- Smooth the rough edges with a file.
- Place the rubber washers in three holes in the mounting bracket included in the kit. The eyelets will act as a washer. The eyelets line up on the bracket as follows: one at the top, one at the bottom, and one on the right
- Connect the fog lamp to the mounting bracket with Two Phillips head screws with washers.
- Remove the two screws that hold the plastic molding for the motorcycle using an 8 mm Allen wrench. Leave the ornament piece in place.
- Fix the bracket with the fog lamp attached to the motorcycle with two flat head screws with washers. The screws fit into the holes to hold the ornament piece in place.
- Remove the trim next to the headlamp control — this step is done by carefully sliding the flathead screwdriver head under the molding. Carefully pry the molding up. Lower the molding until it rises. Squeeze the two clips that hold the motorcycle trim to remove it.
- Remove the headlamp control panel by loosening the screw with a 5 mm Allen key and moving the panel to the side.
- Lift the electrical panel and remove the back by loosening the screw with a 5 mm Allen wrench.
- Remove the black cover by loosening the two Phillips head screws with a Phillips screwdriver.
- Pass the h7 led fog light bulb connector into space previously occupied by the black cover.
- Plug the h7 fog light connector into a free 4-pin connector located on the headlamp control panel.
- Repeat steps 7 to 11 and 15 to 16 to complete the other fog lamp.
- Replace and battery circuit transmission.
- Turn on the light and check to make sure the white h7 fog lights are level. Adjust as necessary.
- Replace the electrical panel, the trim molding, and the lower front fairing. Remove the protective cover.
Tips and warnings
When your headlights start to get dirtier and age, it is not suitable to use at night. It is hard to see with an age headlight. At this point, you need to make an upgrade for your headlight. It is necessary to check your headlight system in regular time.

0 Comments